Highlight text to turn on text-to-audio feature!
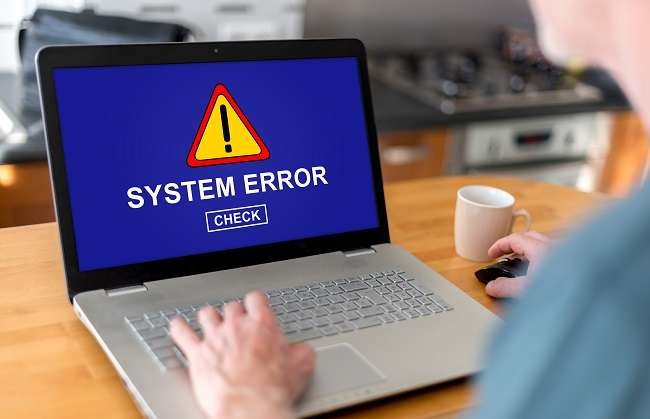
Introduction: How To solve most common laptop problems?
Laptops have become an essential tool in both personal and professional settings, offering portability, versatility, and powerful performance.
However, like any electronic device, they are prone to a variety of issues that can disrupt productivity and cause frustration.
From overheating and slow performance to Wi-Fi connectivity problems and hardware failures, these common laptop problems can arise due to a combination of factors such as wear and tear, software glitches, or improper usage.
Fortunately, many of these issues can be resolved with simple troubleshooting steps, saving you time and money on repairs.
In this guide, we will explore the 10 most common problems faced by laptop users and provide detailed, step-by-step solutions to help you address them effectively.
Whether you’re a tech-savvy user or a beginner, these instructions will empower you to maintain your laptop’s performance and extend its lifespan.
1. Overheating
Solution:
- Step 1: Place your laptop on a hard, flat surface like a desk or table. Avoid using it on soft surfaces such as beds, couches, or pillows, as these can block the air vents and prevent proper airflow.
- Step 2: Turn off the laptop and unplug it from the power source. Use canned compressed air to blow out dust from the cooling vents and fan areas. Hold the can upright and spray short bursts of air into the vents to remove any accumulated dust or debris.
- Step 3: Purchase a cooling pad with built-in fans. Place the laptop on the cooling pad, ensuring that the fans on the pad are aligned with the laptop’s air vents. Turn on the cooling pad and adjust the fan speed if necessary to maintain a comfortable temperature.
- Step 4: Open the power settings on your laptop. Adjust the performance settings to reduce CPU/GPU usage when the laptop is not in heavy use. For example, set the power plan to “Power Saver” or “Balanced” mode instead of “High Performance.”
- Step 5: Download and install a temperature monitoring tool like HWMonitor or Core Temp. Open the software and check the CPU and GPU temperatures. If you notice high temperatures, close unnecessary applications and browser tabs to reduce the load on the system.
For more Information: Can Laptop Overheating Cause Blue Screen of Death?
2. Battery Not Holding Charge
Solution:
- Step 1: Open the battery health report on your laptop. On Windows, type “Command Prompt” in the search bar, right-click, and select “Run as administrator.” Type
powercfg /batteryreportand press Enter. This will generate a report showing the battery’s health and capacity over time.
- Step 2: Fully charge your laptop until it reaches 100%. Once fully charged, unplug the charger and let the laptop run on battery power until it drains completely and shuts down. Afterward, recharge the battery back to 100% without interruption. This process helps recalibrate the battery’s charge indicator.
- Step 3: Visit the laptop manufacturer’s website and download the latest BIOS and power management drivers. Install the updates and restart your laptop to ensure the new drivers take effect.
- Step 4: If your laptop battery is more than 2-3 years old and the health report shows significantly reduced capacity, consider replacing the battery. Contact the manufacturer or a certified repair shop to purchase and install a new battery.
- Step 5: Reduce screen brightness to a comfortable level and disable unnecessary background apps that consume power. On Windows, go to “Settings > System > Power & Sleep” and adjust the display and sleep settings. On macOS, go to “System Preferences > Battery” and enable “Low Power Mode.”
For more Information: Can a Bad Laptop Battery Cause Overheating?
3. Slow Performance
Solution:
- Step 1: Open the Control Panel or Settings app and navigate to “Programs and Features” (Windows) or “Applications” (macOS). Uninstall any programs you no longer use by selecting them and clicking “Uninstall.” Also, clear temporary files by typing “%temp%” in the search bar and deleting all files in the folder that opens.
- Step 2: Run a disk cleanup tool to remove unnecessary files. On Windows, type “Disk Cleanup” in the search bar, select the drive you want to clean, and delete temporary files, system cache, and other junk. For macOS, use the “Storage Management” tool under “About This Mac > Storage.”
- Step 3: Disable startup programs that you don’t need. On Windows, press Ctrl + Shift + Esc to open Task Manager, go to the “Startup” tab, and disable unnecessary programs. On macOS, go to “System Preferences > Users & Groups > Login Items” and remove unwanted apps.
- Step 4: If your laptop has less than 8GB of RAM, consider upgrading to 16GB or more. Alternatively, replace your traditional hard drive (HDD) with a solid-state drive (SSD) for faster read/write speeds. Consult a technician if you’re unsure how to perform the upgrade.
- Step 5: Run a full malware scan using trusted antivirus software like Windows Defender, Malwarebytes, or Avast. Update the antivirus definitions and schedule regular scans to keep your system clean. Also, ensure your operating system and drivers are up to date by enabling automatic updates.
For more Information: Troubleshooting Common Laptop Problems
4. Wi-Fi Connectivity Issues
Solution:
- Step 1: Restart both your laptop and your Wi-Fi router. Turn off the router, wait for 30 seconds, and then turn it back on. Restart your laptop afterward to refresh the network connection.
- Step 2: Move closer to the router to improve signal strength. Avoid physical obstructions like walls, furniture, or electronic devices that may interfere with the Wi-Fi signal.
- Step 3: Visit the laptop manufacturer’s website and download the latest Wi-Fi drivers for your specific model. Install the drivers and restart your laptop to apply the changes.
- Step 4: Log in to your router’s admin panel (usually accessible via 192.168.1.1 or 192.168.0.1 in a web browser). Navigate to the wireless settings and change the Wi-Fi channel to a less congested one, such as channels 1, 6, or 11 for 2.4GHz networks.
- Step 5: Reset your laptop’s network settings. On Windows, go to “Settings > Network & Internet > Status > Network reset.” On macOS, go to “System Preferences > Network,” select your Wi-Fi connection, and click the minus (-) button to remove it. Then reconnect to the network by entering the password.
For more Information: Lenovo IdeaPad Slim Troubleshooting Guide
5. Blue Screen of Death (BSOD)
Solution:
- Step 1: When the blue screen appears, note the error code displayed on the screen. Write it down or take a picture so you can look it up later.
- Step 2: Visit the laptop manufacturer’s website and download the latest drivers for your graphics card, chipset, and other critical components. Install the updates and restart your laptop.
- Step 3: Run a memory diagnostic test to check for faulty RAM. On Windows, type “Windows Memory Diagnostic” in the search bar, select “Restart now and check for problems,” and follow the on-screen instructions.
- Step 4: Clean the laptop’s internal components, especially the cooling system, to prevent overheating. Use compressed air to remove dust from the fans and vents.
- Step 5: Perform a system restore to revert your laptop to a previous stable state. On Windows, type “System Restore” in the search bar, select a restore point from before the BSOD occurred, and follow the prompts.
For more Information: Laptop Overheating and the Blue Screen of Death
6. Keyboard or Touchpad Not Working
Solution:
- Step 1: Restart your laptop to refresh the system and reinitialize the keyboard and touchpad drivers.
- Step 2: Check if the keyboard or touchpad is disabled. On many laptops, pressing the “Fn” key along with a function key (e.g., F6 or F7) toggles the touchpad on or off. Look for an icon on the function keys that resembles a touchpad.
- Step 3: Visit the laptop manufacturer’s website and download the latest keyboard and touchpad drivers. Install the drivers and restart your laptop.
- Step 4: Connect an external USB keyboard and mouse to your laptop. Test if they work properly. If they do, the issue is likely with the internal keyboard or touchpad hardware.
- Step 5: If the internal keyboard or touchpad remains unresponsive, contact the manufacturer or a certified repair shop to diagnose and fix the hardware issue.
For more Information: Laptop Touchpad Not Working Due to Virus
7. No Sound from Speakers
Solution:
- Step 1: Check the volume slider in the taskbar or menu bar. Ensure the volume is turned up and not muted. Click the speaker icon and adjust the volume accordingly.
- Step 2: Right-click the speaker icon in the taskbar and select “Open Sound settings.” Ensure the correct output device is selected (e.g., your laptop’s built-in speakers). If not, switch to the correct device.
- Step 3: Visit the laptop manufacturer’s website and download the latest audio drivers for your model. Install the drivers and restart your laptop.
- Step 4: Run the built-in audio troubleshooter. On Windows, go to “Settings > Update & Security > Troubleshoot > Additional troubleshooters” and select “Playing Audio.” Follow the prompts to identify and fix issues.
- Step 5: Plug in a pair of headphones or external speakers to test if sound works through those devices. If external audio devices work but the internal speakers don’t, the issue is likely with the internal speakers, and you should consult a technician.
For more Information: 15 Common Laptop Problems and Solutions
8. Screen Flickering or Display Issues
Solution:
- Step 1: Visit the laptop manufacturer’s website and download the latest graphics drivers for your model. Install the drivers and restart your laptop.
- Step 2: Right-click on the desktop and select “Display settings.” Scroll down to “Advanced display settings” and adjust the refresh rate to a higher value (e.g., 60Hz or 75Hz).
- Step 3: If you’re using an external monitor, check the cables connecting the monitor to the laptop. Ensure the cables are securely plugged in and not damaged. Replace the cable if necessary.
- Step 4: Perform a system restore to revert your laptop to a previous state before the flickering started. On Windows, type “System Restore” in the search bar and follow the prompts.
- Step 5: If the screen flickering persists, consult a technician to diagnose whether the issue is with the screen, GPU, or motherboard.
For more Information: How to Fix Laptop Screen Flickering
9. Virus or Malware Infection
Solution:
- Step 1: Run a full system scan using trusted antivirus software like Windows Defender, Malwarebytes, or Avast. Wait for the scan to complete and review the results.
- Step 2: Quarantine or remove any detected threats. Follow the antivirus software’s instructions to clean your system.
- Step 3: Avoid downloading software from untrusted websites or clicking on suspicious links in emails or pop-ups. Stick to official app stores or verified sources.
- Step 4: Enable automatic updates for your operating system and installed applications. On Windows, go to “Settings > Update & Security > Windows Update.” On macOS, go to “System Preferences > Software Update.”
- Step 5: Enable the built-in firewall on your laptop. On Windows, go to “Control Panel > System and Security > Windows Defender Firewall.” On macOS, go to “System Preferences > Security & Privacy > Firewall.”
For more Information: Asus ROG Software Issues Guide
10. Hard Drive Failure
Solution:
- Step 1: Back up your important files regularly to an external hard drive or cloud storage service like Google Drive, Dropbox, or OneDrive. Copy all essential documents, photos, and videos to the backup location.
- Step 2: Run a disk check utility to fix file system errors. On Windows, open Command Prompt as an administrator and type
chkdsk C: /f /r(replace “C:” with the appropriate drive letter). Press Enter and follow the prompts.
- Step 3: Listen for unusual noises coming from the hard drive, such as clicking, grinding, or buzzing sounds. These noises indicate mechanical failure and require immediate attention.
- Step 4: If the hard drive is failing, purchase a new drive (preferably an SSD for better performance). Replace the old drive with the new one and reinstall the operating system. Restore your data from the backup.
- Step 5: Consider upgrading to an SSD if you’re still using a traditional HDD. SSDs are faster, more reliable, and less prone to mechanical failure. Consult a technician if you’re unsure how to perform the upgrade.
For more Information: Laptop Problems and Solutions Guidel
The Bottom Line: How can I solve my laptop problems?
Laptops are indispensable tools in our daily lives, but they require regular maintenance and care to function optimally.
By understanding the root causes of common laptop problems and following the detailed solutions provided in this guide,
you can troubleshoot and resolve issues efficiently without needing professional assistance in many cases.
Regularly cleaning your laptop, updating drivers, backing up data, and practicing safe computing habits can go a long way in preventing these problems from occurring in the first place.
Remember, prevention is always better than cure—so take proactive steps like keeping your system updated, avoiding suspicious downloads,
and using proper cooling methods to ensure your laptop remains in top condition.
With the right knowledge and tools, you can enjoy a seamless and hassle-free computing experience for years to come.